
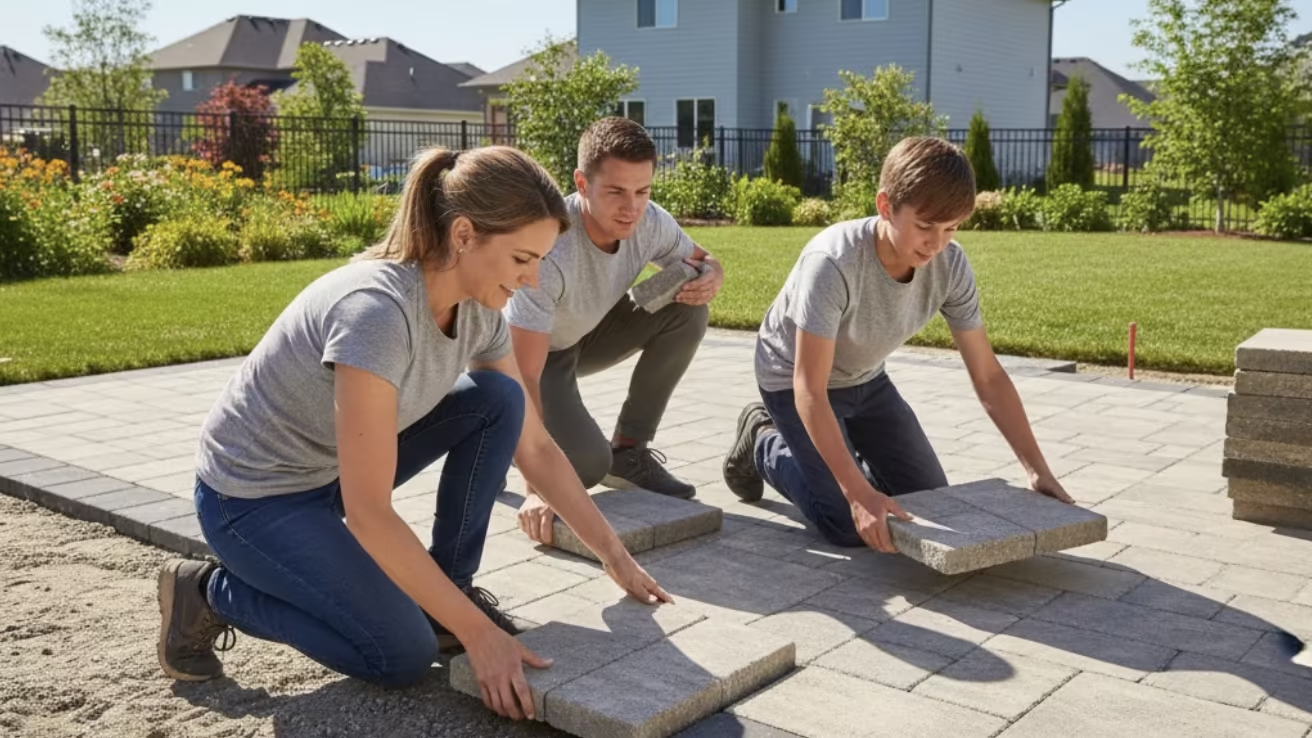
A paver patio is a long‑lasting, attractive outdoor surface made from modular units—concrete, brick, natural stone, porcelain, or permeable pavers—that lock together to form usable living space. When the base, bedding, and edge restraints are specified and installed correctly, pavers give you design flexibility, better drainage options, and years of reliable performance. Homeowners deciding between DIY and pro installation often want a clear roadmap, realistic Bay Area cost guidance, and straightforward material comparisons. This guide walks through planning and excavation, jointing and compaction, paver type choices and permeable options, pattern ideas and turf transitions, plus local cost drivers and maintenance tips. Keep reading for step‑by‑step how‑tos, concise materials and tools lists, cost‑driver tables, and advice on when it’s time to call a pro for a patio that lasts.
What Are the Essential Steps to Build a Paver Patio?
A lasting paver patio follows a reliable sequence: assess the site and plan drainage, excavate and build a compacted sub‑base, install edge restraints, screed bedding sand, lay and cut pavers, fill joints with polymeric sand, then compact and seal. That order ensures loads are distributed, water runs away from structures, and the pavers interlock to resist settling and erosion. Knowing each step helps you avoid common DIY mistakes—like an undersized base or incorrect slope—that lead to ponding or shifting. The sections that follow cover site prep in detail and provide an exact materials‑and‑tools checklist so you can estimate time, labor, and equipment accurately.
How Do You Prepare the Site for Paver Patio Installation?
Site preparation starts with measuring, staking, and checking slope—a finished slope of roughly 1/4″ to 1/2″ per foot away from buildings helps runoff. Excavate to allow for the paver thickness plus bedding sand and a compacted sub‑base: light‑use patios commonly require about 6″ total depth, while heavy‑use or permeable systems may need 12″ or more. Remove organic topsoil, consider geotextile fabric on soft soils, and plan drainage outlets or channels for Bay Area clay and seasonal flows. These steps build a stable foundation that directly affects how long your patio will perform, and they belong before you install edge restraints or screed sand.
What Materials and Tools Are Needed for Installing Pavers?
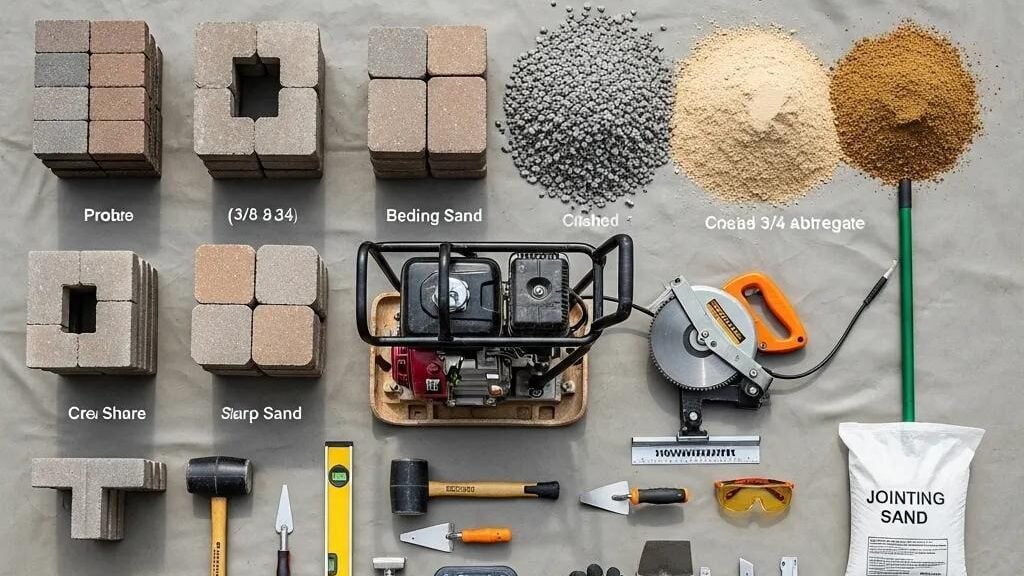
Successful paver work depends on using the right materials and tools for the job. Typical materials include interlocking pavers, a crushed gravel sub‑base (often 3/4″‑minus), bedding sand (concrete or sharp sand), edge restraints, polymeric joint sand, and landscape fabric where needed. Essential tools include a plate compactor (often rented), a level, string line and stakes, a screed board, a paver saw or cutter, a rubber mallet, and a broom. Choosing the correct supplies prevents rework and helps deliver a professional finish—next we’ll list the core items to buy or rent and then compare common paver materials.
Here is a concise materials and tools checklist to guide purchases and rentals:
- Crushed gravel sub‑base (3/4″‑minus) for compaction and drainage.
- Bedding sand (concrete or sharp sand) for a consistent screed surface.
- Edge restraints (plastic or metal) to keep joints stable.
- Plate compactor rental, level, screed board, and paver saw for precision.
Those items cover the essentials; next we’ll compare paver materials so you can match look, budget, and performance.
Which Types of Pavers Are Best for Outdoor Patios?
Picking the right paver balances cost, durability, maintenance, and aesthetic. Concrete, brick, natural stone, porcelain, and permeable interlocking pavers each have clear advantages depending on your priorities. Concrete is versatile and cost‑effective for many Bay Area yards; brick gives a classic look; natural stone delivers premium character; porcelain suits modern aesthetics; and permeable pavers support stormwater management. The table below summarizes common paver types by cost, durability, and best uses to help you choose the right material for your patio goals.
Match the material to your project priorities—budget, heavy entertaining, or sustainability—before you buy.
| Paver Type | Typical Cost | Durability | Maintenance | Recommended Use | Permeability |
|---|---|---|---|---|---|
| Concrete Pavers | Moderate | High | Low; occasional sealing | Versatile patios and outdoor kitchens | Low (unless designed permeable) |
| Brick Pavers | Moderate–High | High | Medium; can effloresce | Traditional looks, walkways | Low |
| Natural Stone (e.g., granite, bluestone) | High | Very High | Medium; joint care | Premium patios, irregular layouts | Low |
| Porcelain Pavers | Moderate–High | High | Low; stain and frost resistant | Modern patios, large panels | Low |
| Permeable Interlocking Pavers | Moderate–High | High when engineered correctly | Medium; vacuuming joints | Sustainable patios, stormwater control | High |
This comparison shows the trade‑offs: natural stone for premium looks, concrete for value and flexibility, and permeable systems when drainage and sustainability matter. Below we break down the benefits of concrete, brick, and stone.
What Are the Benefits of Concrete, Brick, and Natural Stone Pavers?
Concrete pavers offer consistent sizing, a wide color range, and strong interlock that resists movement—plus they’re relatively easy to replace. Brick pavers provide warm color and texture that age well, though they usually need careful base work. Natural stone delivers unique color and surface variation for a high‑end look but raises material and cutting costs. Whatever you pick, proper base construction, edge restraints, and jointing determine long‑term performance, so select materials knowing the installation requirements for your site.
With those choices clear, consider whether a permeable system makes sense for your drainage and sustainability goals.
How Do Permeable Pavers Improve Patio Sustainability and Drainage?
Permeable pavers let water pass through the joints into a granular reservoir below, reducing runoff and helping groundwater recharge—an advantage for low‑impact development and local stormwater targets. Their base typically uses larger aggregate with designed void space and may include an underground reservoir to store runoff. Permeable systems ease pressure on drains, lower ponding risk, and may qualify for sustainability incentives in parts of the Bay Area. Installation differs from conventional setups—grading tolerances, base depth, and joint materials are critical—so proper design balances load capacity with infiltration performance.
After you pick materials and decide on permeability, focus on layout and functionality to get the most from your patio.
How Can You Design a Modern and Functional Paver Patio?
Start by defining how you’ll use the space—dining, lounging, a fire feature, or smooth transitions to turf—and choose scale, pattern, and borders that support those activities. Joint width, color contrast, and border choices change how the space reads; lighting and furniture placement finish usability for both day and night. Blending hardscape and softscape—like artificial turf—gives visual contrast and lowers maintenance in Bay Area climates. The sections below cover popular patterns and practical turf integration so you can design an outdoor room that’s both beautiful and useful.
What Are Popular Paver Patterns and Layouts for Patios?
Patterns create different structural and visual effects: herringbone gives the best interlock for lateral loads, running bond reads as relaxed and linear, basket weave lends classic texture, and circular or radial patterns create focal points for fire pits or tables. Pattern choice affects cutting time and material waste—radial designs require more precise cutting—so match complexity to budget and skill. Use border pavers to frame a pattern and limit edge movement, and orient patterns to visually widen or lengthen a space. Those decisions also shape how you’ll transition to adjacent turf and planting beds.
Pattern and border choices guide the best way to join pavers with artificial turf for a unified yard.
How Do You Integrate Pavers with Artificial Turf and Outdoor Living Spaces?
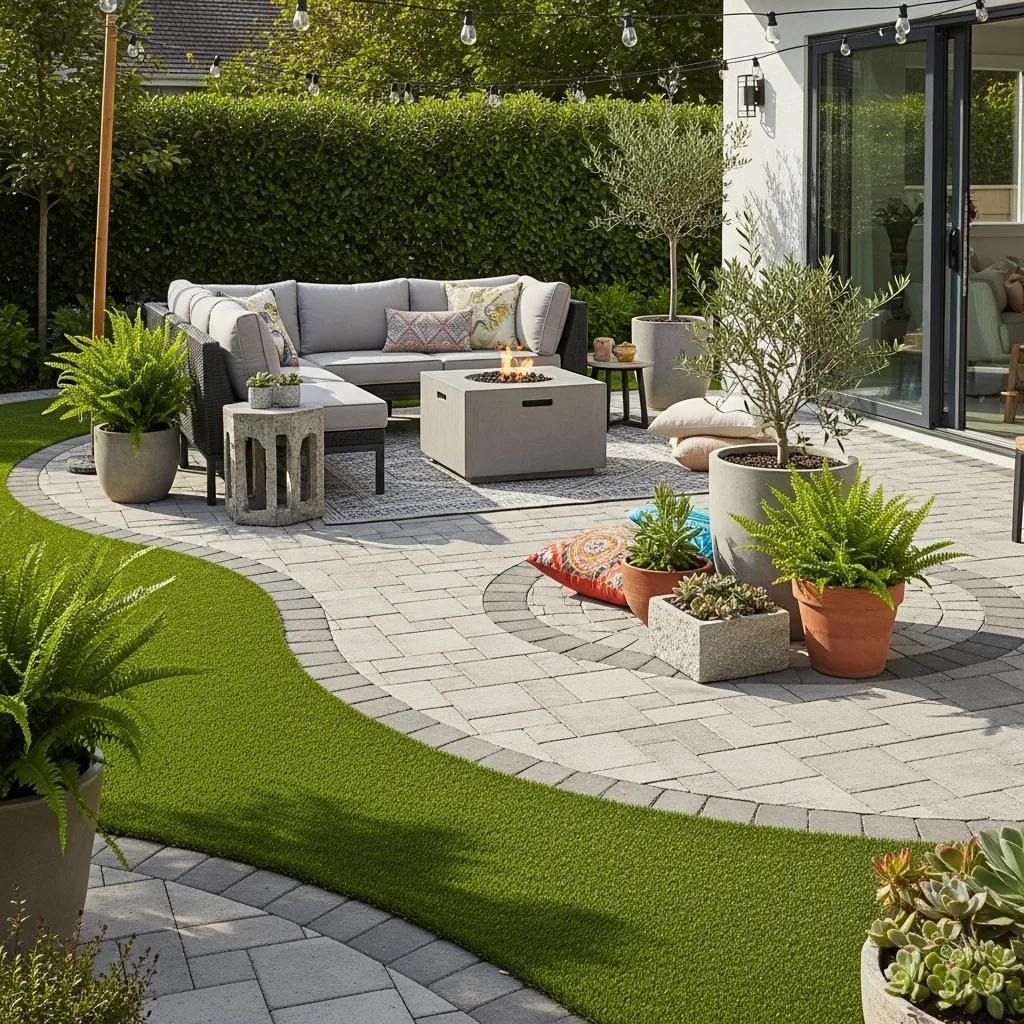
Clean transitions between pavers and artificial turf start with the edge detail: metal or plastic restraints, recessed channels for turf infill, or flush edges for an uninterrupted surface. Turf lowers irrigation needs and maintenance while adding a soft counterpoint to pavers; transitions must handle drainage and allow for edging or mowing access. Heavenly Greens has extensive experience combining turf and paver borders to create neat, functional seams that protect drainage and look intentional. If your design includes planters, built‑in seating, or lighting, install paver edges and drainage features first and add turf last to protect seams and ensure a durable finish.
With layout and transitions decided, the next big question for many Bay Area homeowners is cost—and whether to DIY or hire pros.
What Is the Cost to Install a Paver Patio in the Bay Area?
Paver patio costs in the Bay Area depend on material choice, site prep, whether you choose a permeable system, pattern complexity, and local labor rates. Major cost drivers include excavation and disposal, sub‑base import and compaction, paver quality, edge restraints, cutting and labor intensity, drainage or permeable base work, and any permits or inspections. The table below outlines main cost components and their relative impact on per‑square‑foot pricing so you can see where the budget typically goes.
Local factors—yard access, soil type, and Bay Area labor—can shift estimates considerably, so use this breakdown to prioritize where to spend and when to get professional quotes.
| Cost Component | Attribute | Typical Impact on Price |
|---|---|---|
| Site Preparation & Excavation | Scope, soil type, disposal | High — can be 20–40% of total |
| Sub-base Materials & Compaction | Aggregate quality and depth | High — essential for longevity |
| Paver Materials | Type and finish | Moderate to High — major variable |
| Labor (cutting, laying) | Pattern complexity and accessibility | High — skilled labor intensive |
| Drainage / Permeable Systems | Base design & infiltration features | Moderate — added for sustainability |
| Edge Restraints & Jointing | Material and polymeric sand | Low to Moderate — affects stability |
| Permits & Inspections | Local code requirements | Low to Moderate — varies locally |
The table shows base work and labor usually make up the bulk of cost; below we compare DIY trade‑offs with hiring professionals.
What Factors Influence the Price of Paver Patio Installation?
Key price factors include existing grade and soil conditions, excavation depth for the base, whether you choose a permeable design, the paver material selected, pattern complexity (more cuts means higher labor), equipment access, and permit needs. Clay soils or steep slopes often force deeper excavation and more imported aggregate, driving costs up. Premium natural stone or large‑format porcelain also increase material and cutting expenses. Prioritize a strong base and correct drainage—those investments usually deliver the best long‑term value.
Understanding these drivers helps you weigh DIY versus professional installation for reliability and warranty protection.
How Does DIY Installation Compare to Professional Services?
DIY can save labor costs but requires accurate base design, proper compaction gear, and time—many DIY projects stretch across several weekends, and mistakes like poor compaction or slope can lead to costly repairs. Professionals bring base engineering, compaction testing, precise cutting, and drainage experience that reduce settlement risk and extend patio life. On complex sites, for permeable systems, or when integrating artificial turf, hiring pros often pays off once you factor in durability and reduced rework. Heavenly Greens offers estimates and consultations to help homeowners compare cost, scope, and performance for paver and turf projects.
Requesting a professional quote will clarify budget and timeline and may suggest design choices that save money without sacrificing performance.
How Do You Maintain and Repair a Paver Patio for Longevity?
Regular care keeps paver patios stable and attractive: sweep debris routinely, power‑wash for deep stains when needed, top joints with polymeric sand to deter weeds, and reseal every 2–3 years depending on traffic and product. Fix small settlements by lifting the affected pavers, re‑leveling the base, and re‑compacting to prevent bigger issues. Picking the right sealer and joint material helps with stain resistance and color enhancement—polymeric sand locks joints and limits weeds. The table below compares common maintenance products and schedules to help you build a realistic maintenance plan.
Timely maintenance preserves interlock and drainage and reduces disruptive, costly repairs later on.
| Maintenance Product | Frequency | Benefit |
|---|---|---|
| Acrylic Sealer | Every 2–3 years | Enhances color, protects from stains |
| Penetrating Sealer | Every 3–5 years | Water repellency without gloss |
| Polymeric Joint Sand | As needed after cleaning | Stabilizes joints, reduces weeds |
| Non-Polymeric Joint Sand | Annually topping | Cost-effective but less weed control |
| Cleaner (paver-specific) | As needed | Removes oil and organic stains safely |
Use this table to choose a sealer and joint strategy that matches your patio’s traffic and look.
What Are the Best Practices for Cleaning and Sealing Pavers?
Start with sweeping and prompt spot‑cleaning of oil or food spills using paver‑safe cleaners. Pressure wash at moderate pressure to remove built‑up dirt, but avoid blasting out joint sand. Before sealing, make sure joints are full and dry; apply a compatible sealer in mild weather and follow cure times to prevent residue or uneven bonding. Penetrating sealers keep a natural, matte look, while film‑forming sealers add sheen and extra stain resistance. Proper cleaning and sealing keep pavers looking fresh and cut down on long‑term repairs.
Regular cleaning and sealing reduce weed pressure and make routine repairs simpler.
How Do You Prevent Weeds and Repair Damaged Pavers?
Prevent weeds by using polymeric joint sand, installing geotextile fabric under base layers when appropriate, and keeping joints sealed and debris‑free. To repair, lift the affected pavers, check and re‑level the base, replace crushed stone or sand as needed, re‑compact, then relay the pavers—this restores interlock without replacing the whole patio. Replace cracked units with matching pavers and keep a few spares on hand or choose a supplier with replacement availability. A seasonal maintenance checklist—joint topping, sweeping, and inspections—cuts repair frequency and protects your patio investment.
Having a repair plan minimizes downtime and cost versus full replacement; for complex or integrated turf projects, professional help can be worth it.
Why Choose Professional Paver Patio Installation Services from Heavenly Greens?
Professional installation delivers correct base engineering, precise grading for drainage, secure edge restraints, accurate pattern work, and warranty‑level aftercare—results that maximize durability and performance. Heavenly Greens specializes in outdoor solutions that blend artificial turf with hardscape, offering design consultations that balance low‑maintenance turf with durable paver layouts for cohesive Bay Area yards. Our approach emphasizes water‑wise landscaping and comprehensive installations that address drainage and accessibility. Hiring experienced installers reduces common DIY risks and produces a patio that meets both aesthetic and functional goals.
Here are the main advantages of choosing experienced professionals for your paver patio:
- Correct Base Engineering: Pros design and build a compacted base that resists settlement.
- Precise Drainage Solutions: Skilled crews ensure slopes and drains prevent ponding.
- Quality Finishing & Warranty: Professionals deliver tight joints, clean cuts, and consistent compaction for long life.
Those benefits explain why many homeowners hire professionals; Heavenly Greens’ combined turf and paver expertise is especially helpful when you want low‑water landscapes paired with durable hardscapes.
When you’re ready to move from planning to action, a professional estimate clarifies scope, timeline, and cost. Heavenly Greens offers consultations and design support focused on turf‑to‑paver solutions and complete outdoor living projects.
Request a quote or consultation to review design options, site‑specific drainage, and a tailored scope that aligns paver selection, permeable choices, and artificial turf integration. Heavenly Greens can provide professional estimates and guidance to help you balance cost, sustainability, and long‑term maintenance for your paver patio.
Frequently Asked Questions
What is the best time of year to install a paver patio?
Spring or early fall are ideal: temperatures are moderate and rainfall is less likely, which helps with proper compaction and sealant curing. Extreme heat can dry bedding sand too quickly, while winter frost can cause heave and instability. Scheduling in these milder seasons improves installation quality and longevity.
How long does it take to install a paver patio?
Timing depends on size, complexity, and whether you’re DIY or hiring pros. A DIY project often stretches over several weekends; a professional crew can usually finish a standard patio in 1–3 days, depending on site prep and pattern complexity. Good planning speeds the process and reduces delays.
Can I install pavers over an existing concrete patio?
Yes—if the concrete is sound without major cracks or heaving. Laying pavers over concrete can save excavation work, but you’ll still need a suitable leveling layer (sand or thinset) and to address drainage and finished height at door thresholds and adjacent features.
What maintenance is required for a paver patio?
Routine maintenance includes sweeping, occasional power washing, topping joints as needed, and sealing every 2–3 years. Promptly address small settlements by relaying pavers and re‑compacting the base. A consistent maintenance routine keeps the patio attractive and extends its service life.
Are permeable pavers worth the investment?
Permeable pavers are often worth it in areas where stormwater management matters. They reduce runoff, improve infiltration, and can qualify for local incentives. While upfront costs may be higher, the long‑term drainage benefits and reduced maintenance can make them a smart, sustainable choice.
How do I choose the right paver color and style for my patio?
Consider your home’s architecture, landscape palette, and how you’ll use the space. Neutral tones blend broadly, while bolder choices create focal points. Texture and finish affect slip resistance and the overall feel. Order samples and view them in your yard at different times of day before deciding.
Conclusion
A well‑built paver patio adds useful outdoor space, curb appeal, and lasting value. By following the essential steps, choosing materials that fit your needs, and planning patterns and transitions carefully, you can create a patio that works for your lifestyle. Whether you tackle the job yourself or hire professionals, investing in the right materials and proper installation pays off over time. Ready to start planning? Explore our resources and services to design a patio that looks great and performs for years.


